Increase in the number of contacts

RISKS OF USING MULTI-CONTACT BARS
Since a multi-contact bar is made up of a set of receptacles contained in a single enclosure and a power cord, that is, a cable with a plug, it is connected to a receptacle of the electrical circuit. This increases the load on the branch circuit (if any) causing heating and accelerating aging of the conductors.
Exposure to mechanical hazards
It is common for multi-contact bars to have a limited cable length and the user, in order to use it, connects it to an extension. Having these conductors loose in the ground exposes them to footprints, bruises, edges, pet or rodent bites that damage or wear down the liner exposing the copper, which can cause a direct electric shock to a person or pet; or an electric arc that generates a fire causing human or material losses.
Previous review to increase contacts
Ideally, to increase the number of contacts is to first perform a review of the electrical system conditions and assess whether it is possible to install more contacts.
Another consideration is the type of room and property and the use that will be given to each departure. For example, specific appliances for which the appliance or load current must be considered, such as electric dryers (5000 volt-amperes or the nominal power indicated on the data plate), cooking appliances, motor loads, among others.
Standford Electrical Standford Electrical Standford Electrical Standford Electrical Standford Electrical Standford Electrical Standford Electrical Standford Electrical Standford Electrical Standford Electrical
For the residential case, if the place is humid, the installation of contacts with a ground fault circuit interrupter should be considered for user protection. For common areas such as living rooms, foyers, hallways, and bedrooms, the installation of tamper-proof arc-fault circuit interrupter receptacles is recommended in the case of infants.
Outlets for contacts, except for kitchens and laundry areas, must be considered at less than 180 volt-amperes for each single or multiple contacts installed in the same yoke. Multiple contacts composed of four or more contacts must be rated with not less than 90 volt-amperes for each contact.
CASE OF A BEDROOM

Standford Electrical Standford Electrical Standford Electrical Standford Electrical Standford Electrical Standford Electrical Standford Electrical Standford Electrical Standford Electrical Standford Electrical
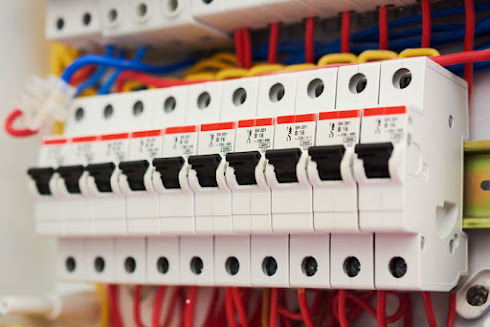
Step 1. Perform verification of the circuit that feeds the only existing contact. The verification should identify the value of the protection. For the above, connect a lamp to the contact and from the load center open the protections one by one, until the lamp turns off, this indicates that you have found the circuit that supplies power to the contact. It is likely that the electrical system does not have a load center, but this is a case that we will not discuss this time.
Step 2. Once the protection is identified, check the conductor's gauge, temperature, and lining; It determines how many contacts it feeds, the number of wires that pass through the pipe, and, if possible, the highest temperature. The way to calculate the load on the receptacles is to multiply the number of receptacles by 180 VA and divide by the supply voltage to get the current; the result must be within the corrected ampacity of the conductor. If the system is three-phase, you can take the power factor value from the utility company's receipt and include it in the previous operation.
Once the corrected current is verified, compare it against the current obtained from the number of contacts.
Standford Electrical Standford Electrical Standford Electrical Standford Electrical Standford Electrical Standford Electrical Standford Electrical Standford Electrical Standford Electrical Standford Electrical
If the calculated current from the number of contacts is less than the corrected current, it determines the number of additional contacts that are needed in the room. For our example, suppose that the corrected current of the conductor is above the current of the installed receptacles and it is possible to increase the number of contacts.
Step 3. Make a sketch with the measurements of the room. In the sketch place the consumer equipment to be installed to determine the number of receptacles needed in the room, the amount of conductor and, if necessary, to protect it, as well as the number of boxes. From where it will feed, trace the grooving path to place the. Consider using a flat-tipped cutter, mallet, and chisel.
Step 4. Make the grooving, place the and the boxes.
Step 5. Patch the wall; Once dry and using a guide, wire and install the receptacles. Depending on the brand, the duplex contacts have two screws on the sides that correspond to the phase and neutral terminals, as well as a green screw for the grounding conductor. In the phase and neutral terminals, one screw is used to connect the conductors coming from the protection and the other to connect the next receptacle.
Step 6. Strip the amount of conductor indicated on the receptacle body or in the instructions. If the terminal is a screw type, place the bare wire around the grounding screw in the tightening direction, with a screwdriver tighten the screw firmly; repeat for neutral and phase screws.
Step 7. Secure the contact to the box with blunt screws. Put the lid on.
Step 8. Once the installation of all the contacts is completed, on the terminals that will be connected to the power supply, carry out a continuity test with a multimeter between the three cables, that is line-neutral, line-ground, neutral-ground. This ensures that there is no short circuit.
Standford Electrical Standford Electrical Standford Electrical Standford Electrical Standford Electrical Standford Electrical Standford Electrical Standford Electrical Standford Electrical Standford Electrical
Step 9. De-energize the circuit you previously identified; Join the conductors with a cap.
Step 10. Energize the circuit and verify the correct polarity of the contacts. For this, you can use a contact, induction, or plug tester.
Comments
Post a Comment